1. Log into your employee portal.
2. From the Home page, click “Time Cards” on the left. By default, the time card for the current pay period will appear.
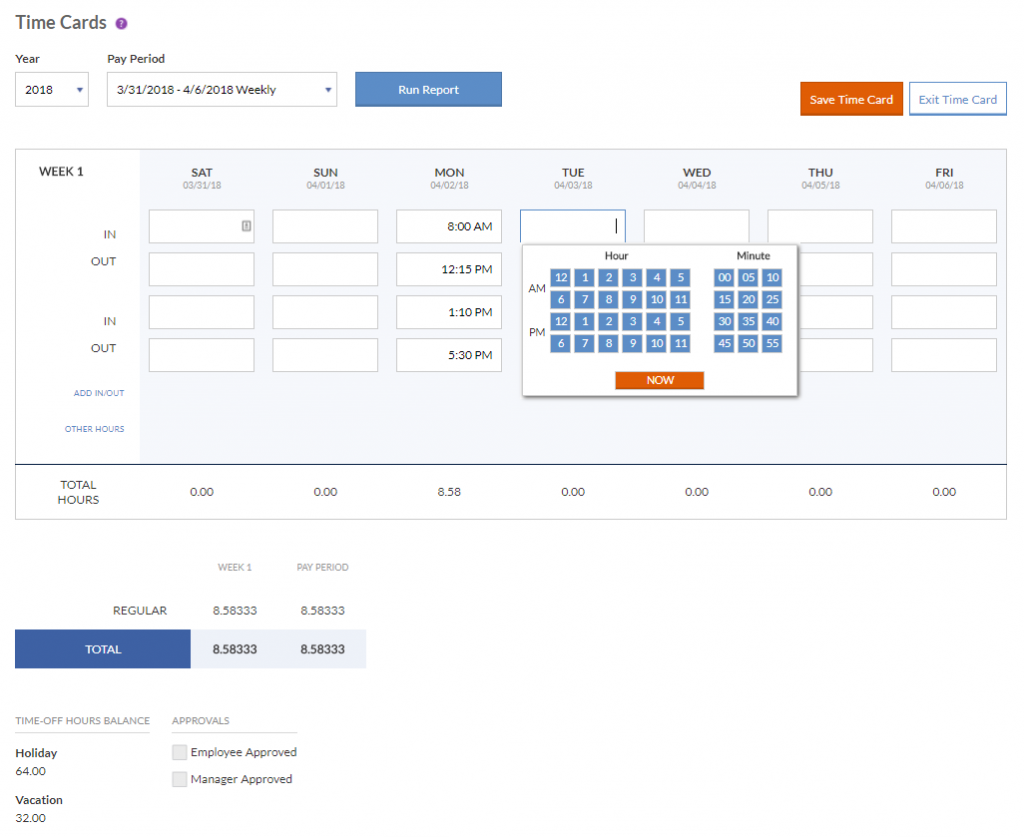
- The current Year and Pay Period will appear in the dropdown lists at the top of the page. To view a time card for a different pay period, select it from the dropdown list, and click Run Report.
- If you are paid weekly, you will see a grid for one week. If you are paid biweekly, you will see a grid for two weeks.
- Each day is shown in columns, and hours types are shown in rows.
3. Enter your time.
- If your employer has set your time card to punch in and out, you will see “Punch In” and “Punch Out” buttons. Click the “Punch In” button to automatically enter an “IN” timestamp on your time card. Click the “Punch Out” button to enter an “OUT” timestamp on your time card. If you miss a punch or need to make corrections to your timecard, you will need to ask your employer to fix this for you. A correction request feature will be coming soon.
- If you do not punch your time, enter the times of day you started and stopped work in the “In” and “Out” cells. When you click inside each cell, a pop-up time entry window will display (see example above). Click on the hour and minute, or just click “Now” for the current time. You can also manually type your hours and minutes in the following format: 9:00AM.
- Click Add In/Out to add another set of “In” and “Out” cells for a day. For example, if you arrive at 8 a.m. and leave for a lunch break from 12 -1 p.m., add another set of in/out cells. Then, you can record your arrival time, when you left for lunch, when you returned, and when you left for the day.
- To track paid breaks, enter the paid break start time in the “In” cell, and enter the paid break stop time in the “Out” cell.
4. Add “Other Hours,” if applicable. If your employer offers tracking for non-worked hours such as vacations or holidays, click “Other Hours.” New rows will appear on your time card (if your employer has added them). Enter the total daily non-worked hours in the corresponding row.
5. Add any comments, if needed. There is space at the bottom of the time card to add your comments about this pay period, such as explaining an absence or a changed work schedule.
6. Check the “Employee Approved” box in the lower right corner when you are finished entering your time for the pay period. You can still make edits after you approve your own time card, but you can no longer make edits once your manager approves the time card and you see the word “Approved” in the top right corner.
7. Click Exit Time Card, and click Yes to save your entries.